
Catalog excerpts

Media Center KMC5 Owner’s Manual | English Manual del Propietario | Español KMC5 Receptor Multi-Media Benutzerhandbuch | Deutsch KMC5 Multi-Media-Receiver Manuel d’utilisation | Française KMC5 Multi-Media Recei
Open the catalog to page 1
FCC Statement This equipment has been tested and found to comply with the limits for a Class B digital device, pursuant to part 15 of the FCC Rules. These limits are designed to provide reasonable protection against harmful interference in a residential installation. This equipment generates, uses, and can radiate radio frequency energy and, if not installed and used in accordance with the instructions, may cause harmful interference to radio communications. However, there is no guarantee that interference will not occur in a particular installation. If this equipment does cause harmful...
Open the catalog to page 2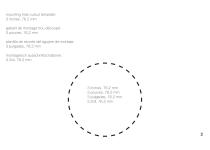
mounting hole cutout template: 3 inches, 76.2 mm gabarit de montage trou découpé: 3 pouces, 76,2 mm plantilla de recorte del agujero de montaje: 3 pulgadas, 76.2 mm montageloch ausschnittschablone : 3 Zoll, 76,2 mm 3 inches, 76.2 mm 3 pouces, 76,2 mm 3 pulgadas, 76.2 mm 3 Zoll, 76,2 mm
Open the catalog to page 3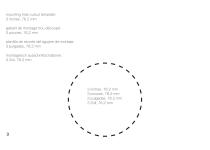
mounting hole cutout template: 3 inches, 76.2 mm gabarit de montage trou découpé: 3 pouces, 76,2 mm plantilla de recorte del agujero de montaje: 3 pulgadas, 76.2 mm montageloch ausschnittschablone : 3 Zoll, 76,2 mm 3 inches, 76.2 mm 3 pouces, 76,2 mm 3 pulgadas, 76.2 mm 3 Zoll, 76,2 mm
Open the catalog to page 4
Contents Specs Overview Installation Operation Troubleshooting Warranty Contentu Spécifications Généralités Installation Utilisation Dépannage Garantie Especificaciones Descripción general Instalación Funcionamiento Resolución de problemas Garantía Technische Daten Übersicht Installation Betrieb Fehlersuche Garantie
Open the catalog to page 5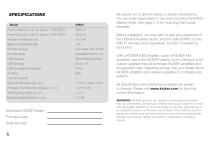
SPECIFICATIONS Model Power Output @ 14.4V, 2Ω stereo, <10% THD+N Be careful not to drill into wiring or vehicle mechanisms. You are solely responsible for securely mounting the KMC5 Media Center. See page 2–3 for mounting hole cutout template. Power Output @ 14.4V, 4Ω stereo, <10% THD+N Pre-Amp Outputs Input Sensitivity USB Compatible File System Outer Trim Dimensions[in, cm] Protrusion From Mounting Surface [in, cm] Total Mounting Depth [in, cm] Mounting Hole Diameter [in, cm] Before installation, you may wish to plan your placement of the USB and Auxiliary inputs, and the optional KRC12...
Open the catalog to page 6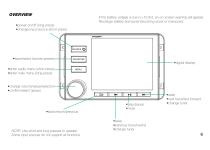
If the battery voltage is low (<+10.5V), an on-screen warning will appear. Recharge battery and avoid becoming stuck or marooned. •power on/off (long press) •change input source (short press) •save/select favorite presets •digital display •enter audio menu (short press) •enter main menu (long press) •change volume/value/selection •confirm/select (press) •play/pause •mute •seek •next track/fast forward •change tuner NOTE: Use short and long presses to operate. Some input sources do not support all functions. •seek •previou
Open the catalog to page 7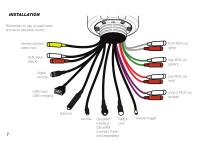
INSTALLATION Remember to cap unused wires and avoid electrical shorts! reverse camera/ video input AUX input (black) digital remote antenna remote NMEA SiriusXM® interface port (SiriusXM Connect Tuner sold separately) reverse trigger
Open the catalog to page 8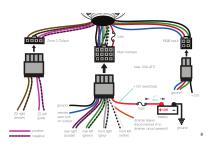
fuse Zone 2 Output RGB Input Main harness ground fuse Z2 right (brown) positive negative remote auto-turn on output rear right (purple) rear left (green) front right (grey) front left (white) dimmer (leave disconnected if no dimmer circuit present)
Open the catalog to page 9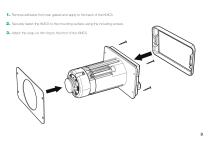
1. Remove adhesive from rear gasket and apply to the back of the KMC5. 2. Securely fasten the KMC5 to the mounting surface using the including screws. 3. Attach the snap-on trim ring to the front of the KMC5.
Open the catalog to page 10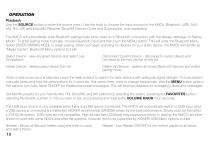
OPERATION Playback Use the SOURCE button to enter the source menu. Use the knob to choose the input source for the KMC5: Bluetooth, USB, AUX, AM, FM, WX, and SiriusXM (Requires SiriusXM Connect Tuner and Subscription, sold separately). The KMC5 will automatically enter Bluetooth pairing mode when there is no Bluetooth connection, with the display message “In Pairing Mode”. To enter pairing mode manually, choose Bluetooth input and then push the MENU button. This will enter the Bluetooth Menu. Select ENTER PAIRING MODE to begin pairing. When you begin scanning for devices on your audio...
Open the catalog to page 11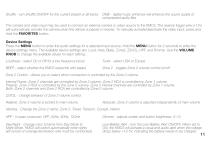
Shuffle - turn Shuffle ON/OFF for the current playlist or all tracks DME - digital music enhancer will enhance the sound quality of compressed audio files. The camera and video input may be used to connect an external camera or video source to the KMC5. The reverse trigger wire (+12v) will automatically activate the camera when the vehicle is placed in reverse. To manually activate/deactivate the video input, press and hold the FAVORITES button. Device Settings Press the MENU button to enter the audio settings for a selected input source. Hold the MENU button for 2 seconds to enter the device...
Open the catalog to page 12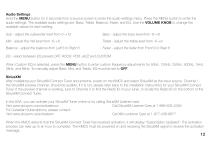
Audio Settings Hold the MENU button for 2 seconds from a source screen to enter the audio settings menu. Press the MENU button to enter the audio settings. The available audio settings are: Bass, Treble, Balance, Fader, and EQ. Use the VOLUME KNOB to change the available values for each setting. Sub - adjust the subwoofer level from 0–+12 Bass - adjust the bass level from -6–+6 Mid - adjust the mid level from -6–+6 Treble - adjust the treble level from -6–+6 Balance - adjust the balance from Left 6 to Right 6 Fader - adjust the fader from Front 6 to Rear 6 EQ - select between EQ...
Open the catalog to page 13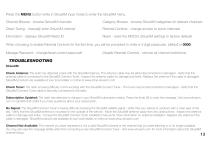
Press the MENU button while in SiriusXM input mode to enter the SiriusXM menu. Channel Browse - browse SiriusXM channels Category Browse - browse SiriusXM categories for relevant channels Direct Tuning - manually enter SiriusXM channel Parental Controls - change access to some channels Information - displays SiriusXM Radio ID Reset - reset the KMC5’s SiriusXM settings to factory defaults. When choosing to enable Parental Controls for the first time, you will be prompted to enter a 4-digit passcode. (default is 0000) Manage Password - change/reset current passcode Disable Parental Controls -...
Open the catalog to page 14


