
- Catalogs
- Johnson Pump Marine
- Marine Lavatory Systems AquaT Manual Toilets

- Company
- Products
- Catalogs
- News & Trends
- Exhibitions
Marine Lavatory Systems AquaT Manual Toilets

Marine Lavatory Systems AquaT Manual Toilets
This manual provides comprehensive instructions for the AquaT Manual marine toilet, available in Comfort, Compact, and Super Compact models. It is crucial to read and understand this manual before operating or servicing the product.
The AquaT toilets come with a two-year warranty, which is void if the bowl is broken or if instructions regarding the electrical system and usage are not followed. The use of strong detergents is prohibited as they can damage the pump seals. Warranty claims require returning all items to the point of purchase with assembly instructions and proof of purchase.
The toilets can be installed in motor and sailboats, either above or below the waterline, for use at sea, rivers, lakes, or canals. Waste can be discharged overboard or to a treatment system or holding tank onboard.
The AquaT toilets feature a flexible hole structure for easy replacement, reversible pump mounting, a self-priming double-acting piston pump, and a brass piston rod guide for durability. They also include a powerful swirl action for effective flushing, ergonomic handle, dual check valves to prevent backflow, and accessible mounting points for quick installation.
The seat and lid are made of polypropylene, with a hygienic white ceramic bowl. The base is molded from ABS or polypropylene, with stainless steel fasteners, brass weights, and neoprene seals and gaskets.
The toilet is self-priming up to 1 meter (3ft) dry height and has a discharge height of 3 meters (9ft).
For through-hull connections, use a 19 mm (¾”) seacock for the inlet and a 38 mm (1½”) seacock for the outlet if discharging overboard. Use spiral-reinforced smooth-bore flexible hose for both inlet and outlet, securing hoses to prevent movement and avoid sharp bends.
Do not expose hoses or plastic fittings to open flame or heat. Secure all hose ends with stainless steel clamps, ensuring airtight inlet connections and watertight outlet connections.
Refer to the operating instructions for normal use. If the pump is difficult to prime, fill the bowl halfway with fresh water.
Ensure these instructions are available to the owner, skipper, or user of the boat, as they contain important safety information.
If the toilet is connected through the hull and the rim is below the waterline, water can flow in, causing the boat to sink. Install a vented loop in all through-hull connections if the rim is less than 20 cm (8”) above the waterline.
To replace a worn-out seal assembly in the pump, a gasket kit is required. The process involves securing the piston rod with tape, removing the handle and bumper washer, unscrewing the seal assembly, and replacing it with a new one.
To protect against frost damage and bacterial growth, the system should be drained completely. Warning notices should be attached to seacocks to prevent accidental opening.
An overhaul requires a service kit with all wearing parts. The pump assembly is removed by disconnecting hoses and unscrewing components, then cleaned and reassembled with new parts.
The manual provides dimensions and weights for different models of AquaT toilets, including Compact, Super Compact, and Comfort versions.
A list of spare parts with model numbers is provided for easy reference, including seats, gaskets, elbows, and pump assemblies.
Ensure seacocks are open before use and closed after. Prime the flushing pump by filling the bowl with water if necessary. Use long, smooth strokes when operating the pump.
Regularly flush with clean water to maintain cleanliness and odor control. Use non-abrasive cleaners for the toilet and disinfect with diluted solutions.
Drain the system to prevent freeze damage and bacterial growth. Attach warning tags to valves to prevent accidental opening.
Catalog excerpts

AquaT Toilet - Manual M A N UA L M O D E L S - C o m f o r t , C o m p a c t & S u p e r C o m p a c t Super Compact
Open the catalog to page 1
Produkterna har två (2) års garanti. Garanti medges ej vid följande fall: • om skålen är trasig • om de avpassade instruktionerna avseende det elektriska systemet och bruksanvisningen inte följts på rätt sätt. Varning: användning av starka rengöringsmedel för att rengöra toaletten är förbjudet eftersom dessa produkter stannar kvar inuti systemet och bränner igenom pumpens gummitätningar. Eventuella spår funna på reklamerade varor upphäver garantin. För att kunna utnyttja garantin måste samtliga artiklar skickas tillbaka till inköpsstället tillsammans med monteringsinstruktioner och inköpsbevis....
Open the catalog to page 2
Allmänna instruktioner för samtliga installationer AquaT Comfort och Compact skål manuella marintoaletter kan installeras både i motor- och segelbåtar, antingen ovan eller under vattenlinjen, för användning till havs, på älvar, sjöar eller kanaler. Avloppet kan antingen ledas överbord (vänligen ha nationella eller lokala restriktioner i åtanke), eller till ett behandlingssystem eller till en holdingtank ombord. OBS! SPX FLOW Johnson Pump manuella toaletter är speciellt konstruerade för marint bruk. Konsultera din återförsäljare av SPX FLOW Johnson Pump för råd om icke marina tillämpningar. Du...
Open the catalog to page 3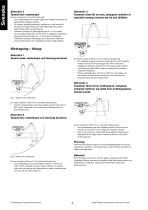
Alternativ 2 Toalett över vattenlinjen Alternativ 3 Toaletten töms till en tank, utloppets vinkelrör är nedanför tankens översta del vid alla tillfällen Du kan använda en 19 mm (¾”) backventil • Led inloppsslangen den rakaste vägen från inloppets bottenkran till spolpumpens inloppsanslutning. • För maximal praktisk användning, installera en in-line backventil närmast till inloppets bottenkran vilket säkerställer att pumpen förblir flödad mellan användningarna. • Toalettens spolpump är självsugande upp till 1 m (3’) ovanför den utvändiga vattennivån. Om det finns en möjlighet att toalettens spolpumps...
Open the catalog to page 4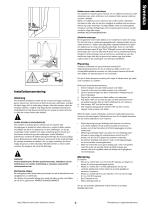
Särskilda noteringar Ett inloppsrörnät med mindre kaliber är mer riskfyllt än ett större för utlopp. Om det inte finns en ventilerad sugskyddad krök i inloppsrörnätet, kommer vatten strömma in i skålen varje gång både inloppets bottenkran är öppen och skålens kant är under den aktuella vattenlinjen. Även om man flyttar spolanordningens spak till läge ”Shut” (Stängd) kommer det att begränsa strömningen, kan man inte sätta tillit till denna som en säkerhetsanordning. Att göra en krök på slangen utan att montera en avluftning kan vara lika riskfyllt som ingen krök alls, på grund av att vattnet sugs...
Open the catalog to page 5
Efter användning Sätt toaletten på den utvalda platsen. Använd hålen i underredet som mall och märk ut ställena för de 4 skruvhålen på monteringsunderlaget. Ta bort toaletten och borra 4 vertikala hål, med en diameter på 9 mm, genom monteringsunderlaget. Lägg på det vita silikontätningsmedlet på den yttre kanten nederst på underredet. Sätt toaletten på plats och dra fast den ordentligt. Om du inte använder självlåsande muttrar, använd gänglåsning. • Stäng spolkontrollen ( ) • Stäng båda bottenkranarna. OBS! Stoppa inget av följande i toaletten: Sanitetsbindor, våtservetter, bomull, cigaretter,...
Open the catalog to page 6
Lossa pumpmonteringen enligt följande • Lossa slangklämmor och koppla bort inloppsslangen och mellanslangen från pumpens övre del. • Ta bort de 2 skruvarna som fäster utloppsflänsen och vinkelröret till pumpcylindern. • Ta INTE bort slangklämman och slangen från utloppets vinkelrör. • Ta bort de 4 skruvarna som fäster pumpcylindern mot underredet. • Lyft bort pumpmontaget och ta upp bottenventilpackningen och jokerventilen. Om vatten börjar läcka runt kolvstången på pumpen, betyder det att tätningsmonteringen är sliten och behöver bytas. För att kunna göra det bör du gå tillväga som följer: Du...
Open the catalog to page 7
AquaT Toilet Manual Super Compact AquaT Toilet Manual Compact AquaT Toilet Manual Comfort mm/ inch mm inch mm inch mm inch See page 39 for larger pictures Pos. Beskrivning Modell Nr 1 Plastsits, Compact & Super Compact 81-47241-04 Plastsits, Comfort 81-47241-05 3a Inloppskrök 81-47640-01 3b Inloppskrök 81-47246-01 4 Packningssats, komplett 81-47242-01 5 Utloppskrök 81-47246-02 6 Underrede av plast 81-47243-01 Pos. Beskrivning 8 Packningssats, underrede 9 Spolhandtagsats 10 Handtagssats 11 Manual Toilet Pump Komplett exkl. utloppskrök (pos. 5) 12 Plugg-kit AquaT Manual marine toilet- Instruction...
Open the catalog to page 8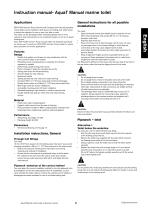
Instruction manual- AquaT Manual marine toilet Applications General instructions for all possible installations You need: • Spiral reinforced smooth bore flexible hose for both the 19 mm. (3/4") internal diameter inlet and the 38 mm (1 1/2") internal diameter outlet hose • Stainless steel hose clip • Secure the hose runs so that the hoses cannot move, nor exert any leverage action on the hosetail fittings to which they are connected, as this may cause adjacent joints to leak. • Avoid sharp bends in the hoses since this might cause them to become kinked • Keep all pipework lengths as short as...
Open the catalog to page 9
Alternative 2 Toilet above the waterline Alternative 3 Toilet waste discharging into holding tank, discharge elbow below top of holding tank at any time You may use a 19 mm. (3/4”) non-return valve • Run the inlet hose by the most direct route from the inlet seacock to the flushing pump inlet tail • For your maximum convenience of use, install an in-line non return valve next to the inlet seacock which will ensure that the pump stays primed in between usages. • The toilet flushing pump will self-prime up to 1m (3’) above the outside water level. If there is any possibility that the toilet flushing...
Open the catalog to page 10All Johnson Pump Marine catalogs and brochures
 WASTE WATER PUMPS (US)
2 Pages
 WASTE WATER PUMPS (GB)
2 Pages
 TALULAH BALLAST PUMPS (US)
2 Pages
 TALULAH BALLAST PUMPS (GB)
2 Pages
 MARINE TOILETS (GB)
2 Pages
 MACERATOR (GB)
2 Pages
 HEAVY DUTY BILGE PUMPS (GB)
2 Pages
 Marine Catalog (US)
60 Pages
 CM100HF High Flow Flyer
2 Pages
 CM100HP High Power Flyer
2 Pages
 Viking Universal
2 Pages
 Viking Compact
2 Pages
 Viking Power 16
2 Pages
 Bilge Pump Control Panel
14 Pages
 CM90 Circulation Pumps
2 Pages
 Marine Catalogue (GB)
60 Pages
 Service Kit & Part Reference Guide
100 Pages


Archived catalogs

- Johnson Pump boat pump
- Johnson Pump transfer pump
- Johnson Pump 12 V pump
- Johnson Pump impeller pump
- Johnson Pump 24 V pump
- Johnson Pump bilge pump
- Johnson Pump self-priming pump
- Boat monitoring and control panel
- Boat tank
- Johnson Pump oil pump
- Boat switch
- Water tank
- Engine cooling pump
- Positive-displacement pump
- Johnson Pump submersible pump
- Boat valve
- Nautical hand pump
- Bilge blower
- Electric toilet