
- Catalogs
- Dickinson Marine
- Mediterranean / Caribbean

Mediterranean / Caribbean

Mediterranean / Caribbean
- Use a flexible, fire-resistant hose approved for propane systems for gimbaled installations. For standard installations, use soft copper tubing or an approved gas hose.
- Ensure the fuel line is one continuous length to prevent leaks, and avoid using a "T" connection outside the propane locker.
- Protect hoses from kinks and damage, and secure them with non-corrosive ties or clamps.
- Do not use Teflon tape on propane connections; use thread sealant instead.
- Check for leaks using a soapy water solution before lighting the stove for the first time.
- Ensure burner tops are properly seated before lighting. Use the electronic spark ignition to light burners and hold the knob for 5-10 seconds to heat the thermocouple.
- For oven and broiler burners, allow air to bleed out of lines before lighting. Use a secondary thermometer for accurate temperature readings.
- Use appropriately sized cookware to ensure even heat distribution and prevent burns.
- Choose cookware materials wisely: aluminum and copper are excellent conductors, while stainless steel and cast iron have slower heat conduction.
- Avoid covering oven racks with aluminum foil to ensure proper air circulation.
- Clean spills promptly and avoid abrasive cleaners. Use household liquid cleaners and non-metallic abrasives.
- Periodically rotate gas valves during prolonged lay-up periods to prevent seizure.
- Remove and clean burner orifices and the oven heat-disperser as needed.
- Ensure gas supply is open and sufficient pressure is maintained.
- Check for clogged orifices or faulty igniters if burners do not light or stay lit.
- Calibrate oven temperature if it does not match the settings.
- Mediterranean Cutting Board
- Caribbean Pot Holder
- Mediterranean Pot Holders
- Pot Holder Rail
- Caribbean Cooking Grate
- Mediterranean Cooking Grate
- Burner Control Knob
- Oven Control Knob
- 2 Spark Ignitor Box
- Large Burner Thermocouple
- Small Burner Thermocouple
- Oven Burner Thermocouple
- Broiler Thermocouple
- Large Burner
- Small Burner
- Oven Burner
- Broiler Burner
- Large Burner Gas Valve
- Small Burner Gas Valve
- Oven/Broiler Gas Valve
- Caribbean Built In Kit
- Mediterranean Built in Kit
- Gimbal Mount
- 10ft Low Pressure Propane Hose
- 20ft Low Pressure Propane Hose
- Disposable Bottle Kit
- Low Pressure Regulator
- Fittings Kit
- Solenoid Valve
- Gas Sniffer with Shut Down
- Low Pressure 2 Stage Regulator
- 2 Appliance Fittings & Shut-offs
- 3rd Appliance Shut-off Fittings Kit Add On
Dickinson provides a one-year warranty against defects in workmanship and materials. Claims must be submitted in writing within one year of purchase. The warranty covers only the original purchaser and excludes normal wear, unauthorized repairs, misuse, and exposure to corrosive conditions. Dickinson is not liable for incidental or consequential damages. The warranty is non-transferable and requires the completion of a warranty card within 30 days of delivery.
In case of defects, notify Dickinson promptly with details including name, address, model, and description of the problem. The warranty card must be filled out and returned to validate coverage.
Catalog excerpts

2 Burner Stove 3 Burner Stove This instruction manual contains important information necessary for the assembly, installation and safe operation of this stove to REMOVE CUTTING BOARD BEFORE OPERATING STOVE/OVEN
Open the catalog to page 1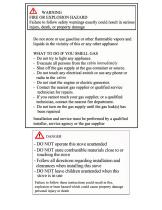
FIRE OR EXPLOSION HAZARD Failure to follow safety warnings exactly could result in serious injury, death, or property damage Do not store or use gasoline or other flammable vapors and liquids in the vicinity of this or any other appliance - Evacuate all persons from the cabin immediately - Shut off the gas supply at the gas container or source. - Do not touch any electrical switch or use any phone or radio in the cabin - Do not start the engine or electric generator - Contact the nearest gas supplier or qualified service technician for repairs. - If you cannot reach your gas supplier, or a qualified...
Open the catalog to page 2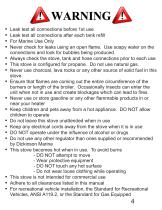
• Leak test all connections before 1st use • Leak test all connections after each tank refill • Never check for leaks using an open flame. Use soapy water on the connections and look for bubbles being produced. • Always check the stove, tank and hose connections prior to each use • This stove is configured for propane. Do not use natural gas. • Never use charcoal, lava rocks or any other source of solid fuel in this stove • Ensure that flames are coming out the entire circumference of the burners or length of the broiler. Occasionally insects can enter the unit when not in use and create blockages...
Open the catalog to page 4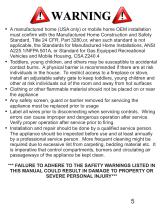
Ÿ A manufactured home (USA only) or mobile home OEM installation must confirm with the Manufactured Home Construction and Safety Standard, Title 24 CFR, Part 3280,or, when such standard is not applicable, the Standards for Manufactured Home Installations, ANSI A225.1/NFPA 501A, or Standard for Gas Equipped Recreational Vehicles and Mobile Housing, CSA Z240.4 Toddlers, young children, and others may be susceptible to accidental contact burns. A physical barrier is recommended if there are at risk individuals in the house. To restrict access to a fireplace or stove, install an adjustable safety gate...
Open the catalog to page 5
• The stove and its individual shutoff valve must be disconnected from the gas supply piping system during any pressure testing of that system at test pressures in excess of 1/2 PSI (3.5kPa) • The appliance must be isolated from the gas supply piping system by closing it’s individual manual shut-off valve during any pressure testing of the gas supply piping system in equal or less than 1/2 PSI (3.5kPa) • The LP gas supply cylinder to be used MUST be constructed and marked in accordance with the specifications for LP gas cylinders, U.S. Department of Transportation (DOT) or the standard for cylinders,...
Open the catalog to page 6
About our Propane Galley Stoves One of our newer appliances, our Dickinson propane galley ranges are clean burning appliances designed for use in marine environment but are adaptable to many applications. With a large range of setting they are ideal for all cooking situations and are great to have in any galley. Made out of attractive stainless steel our stoves are durable and beautiful. The stainless design is resistant to corrosion and will keep its shine for many years. The burners have porcelain capping for a nice glossy black look which looks great with grained finish of the stove. Paired...
Open the catalog to page 7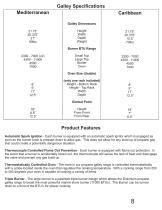
Galley Specifications Height Width Depth Weight Small Top Large Top Broiler Oven (only one rack included) Height - Bottom Rack Height - Top Rack Width Depth Height From Front From Rear Product Features Automatic Spark Ignition - Each burner is equipped with an automatic spark ignitor which is engaged as soon as the burner knob is pressed down to allow gas. This does not allow for any build up of propane gas that could create a potentially dangerous situation. Thermocouple Controlled Flame Out Prevention - Each burner is equipped with flame out protection. In the event that a burner is accidentally...
Open the catalog to page 8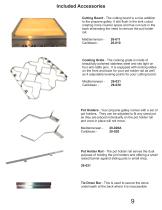
Included Accessories Cutting Board - The cutting board is a nice addition to the propane galley. It sits flush in the sink cutout creating more counter space and has cut outs in the back eliminating the need to remove the pot holder rail. Cooking Grate - The cooking grate is made of beautifully polished stainless steel and sits tight on four anti-rattle pins. It is equipped with locking slides on the front and back for your pot holder rail as well as 4 adjustable leveling points for your cutting board. Pot Holders - Your propane galley comes with a set of pot holders. They can be adjusted to...
Open the catalog to page 9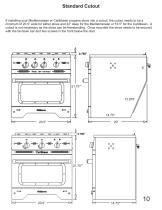
Standard Cutout If installing your Mediterranean or Caribbean propane stove into a cutout, the cutout needs to be a minimum of 20.5” wide for either stove and 22” deep for the Mediterranean or 16.5” for the Caribbean. A cutout is not necessary as the stove can be freestanding. Once mounted the stove needs to be secured with the tie down bar and two screws in the front below the door.
Open the catalog to page 10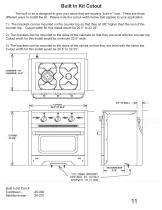
The built in kit is designed to give your stove that pre-existing “built-in” look. There are three different ways to install the kit. Please note the cutout width below that applies to your application. 1) The brackets can be mounted on the counter top so that they sit 3/8” higher then the rest of the counter top. Cutout width for this install would be 20.5” to 22.25”. 2) The brackets can be mounted to the sides of the cabinets so that they are level with the counter top. Cutout width for this install would be minimum 22.5” wide. 3) The brackets can be mounted to the sides of the stoves so that...
Open the catalog to page 11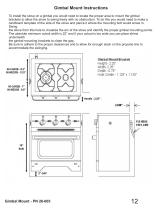
To install the stove on a gimbal you would need to locate the proper area to mount the gimbal brackets to allow the stove to swing freely with no obstruction. To do this you would need to make a cardboard template of the side of the stove and pierce it where the mounting bolt would screw in. the stove from this hole to visualize the arc of the stove and identify the proper gimbal mounting points. The absolute minimum cutout width is 22” and if your cutout is too wide you can place shims underneath the gimbal mounting brackets to close the gap. Be sure to adhere to the proper clearances and to...
Open the catalog to page 12All Dickinson Marine catalogs and brochures
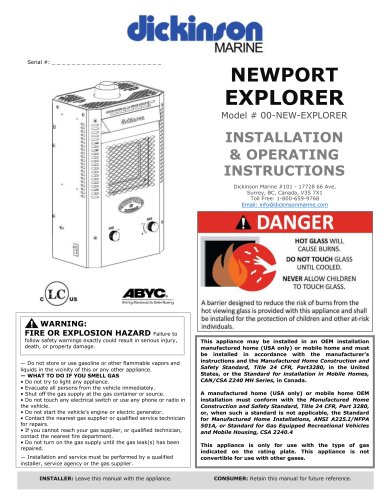 Explorer Propane Fireplace
54 Pages
 Propane Heater P9P12
31 Pages
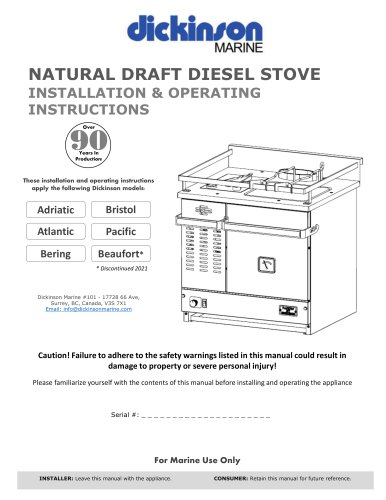 Diesel Stove
53 Pages
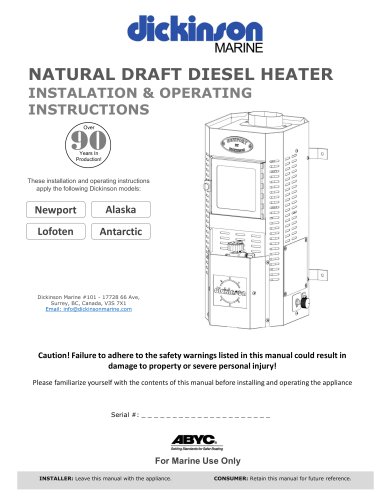 Diesel Heater
53 Pages
Archived catalogs
 LOFOTEN-00-LOF - Pdf
41 Pages
 Lofoten Diesel Heater
1 Page
 NEWPORT P9000-P12000
1 Page
 ANTARCTIC DIESEL HEATER
1 Page
 Alaska-00-ALA Pdf
41 Pages
 Pacific-00-PAC . PDF
39 Pages
 BRISTOL-00-BRI.PDF
38 Pages
 BERING-00-BER . PDF
38 Pages
 BEAUFORT-00-BEA.PDF
39 Pages
 Small SEA-B-QUE
1 Page
 Large SEA-B-QUE
1 Page
 Round SEA-B-QUE
1 Page
 Spitfire 180
1 Page
 Propane 2 Burner Cooker
1 Page
 Alaska Diesel Heater
1 Page
 Antarctic Diesel Heater
1 Page
 Newport Diesel Heater
1 Page
 Diesel Cook-Stoves
2 Pages
 Dickinson Cabin Heaters
2 Pages
 Dickinson Marine BBQ
1 Page


