
- Catalogs
- Dickinson Marine
- Diesel Heater

Diesel Heater
Diesel Heater
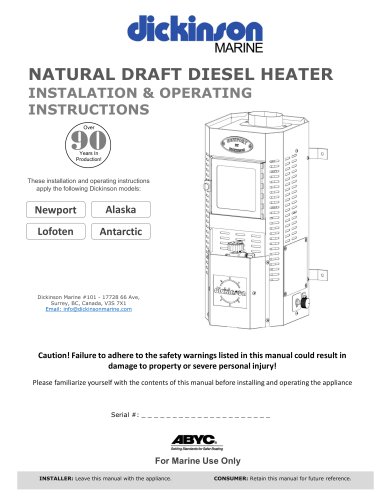
This manual provides installation and operating instructions for Dickinson Marine's natural draft diesel heaters, specifically designed for marine use. It covers models such as Newport, Lofoten, Alaska, and Antarctic, emphasizing adherence to safety warnings to prevent property damage or personal injury.
Key warnings include not operating the appliance unattended, ensuring an open fresh air vent, using only no. 2 Diesel fuel, and keeping children and pets away. It is crucial to avoid using gasoline or any solid fuels and to follow all clearance guidelines.
Dickinson Marine offers a limited one-year warranty from the purchase date, covering defects in workmanship and materials. The warranty requires registration within 90 days of purchase and is non-transferable. It excludes normal wear, misuse, and exposure to corrosive conditions.
The guide provides detailed instructions on where and how to install the appliance, including considerations for sailboats and optimal location choices. It includes a checklist and discusses chimney variations and fuel supply systems.
Before lighting, users must read the operating instructions, which cover adjustments, fuel-air mixture, and tips for efficient operation. It also includes guidance on barometric damper settings and draft testing.
Regular maintenance is essential for optimal performance. The manual outlines procedures for maintaining the system, fuel filter, fuel line, burner, chimney, and metering valve.
This section provides solutions for common issues such as soot production, insufficient heat, inconsistent fuel flow, and noisy fan operation.
The manual concludes with a glossary of terms and a list of illustrations to aid in understanding and installation.
- Only use approved fuels; do not burn gasoline or mix fuels.
- Ensure the appliance has a chimney that meets minimum installation requirements and an open fresh air vent.
- Fuel pressure should not exceed 3 PSI, and the appliance should not be supplied from a pressurized fuel tank.
- Ensure accessibility to controls and maintenance areas.
- Assess the appliance's requirements and ensure the location meets safety clearances, chimney lengths, and fuel/power hookup requirements.
- For sailboats, ensure the fuel line is aligned with the keel to maintain fuel supply when the boat heels.
- Choose a location that allows for a straight chimney run of 4-6 feet without bends, if possible.
- Calculate BTU needs based on space size, insulation condition, climate, and number of inhabitants.
- Use the formula: No. of sq ft. x 20 = approximate BTU requirement.
- Consider factors like insulation, windows, climate, and interior chimney length for efficient heating.
- Ensure the appliance is level.
- Plan the chimney run and check safety clearances.
- Assemble the chimney and connect fuel and overflow lines.
- Perform a systems test before lighting the appliance.
- For sailboats, the appliance should ideally face the bow or stern to maintain fuel flow.
- Safety clearances must be adhered to, and children and pets should be kept away from the appliance during operation.
The document provides detailed instructions on the installation and maintenance of a fuel supply system for appliances. It emphasizes the importance of proper configuration to ensure safety and efficiency.
The overflow evacuation line must be gravity-fed and should not be installed with upward loops to prevent air locks. It should return to the main fuel tank, and a manual shut-off is required if the tank's vent is higher than the appliance valve.
Fuel must be filtered before reaching the pump or metering valve to prevent blockages. A manual shut-off valve is necessary to relieve pressure when the appliance is not in use.
When using a low-pressure fuel pump, it should be connected close to the fuel tank and not from the engine supply line. A check valve is recommended to prevent fuel from being drawn away from the appliance.
Gravity feed is silent and requires a day tank positioned higher than the appliance, while a pump can draw from an existing source but requires a power source and maintenance.
The oil metering valve is rated for 3 PSI. If pressure exceeds 4 PSI, a regulator is needed. Larger tanks or those positioned high require a pressure regulator.
The pump should be installed with its outlet upwards and primed before use. It should be in a ventilated area, not used for gasoline, and equipped with a pressure regulator.
A 12v draft assist fan is recommended for better combustion control. It should be used during light-up and high fuel settings, and turned off once the appliance reaches operating temperature.
Appliances can be equipped with water coils for hot water supply. The system should include a pressure relief to avoid dangerous pressure build-up. Professional advice is recommended for installation.
- Only individuals familiar with the appliance and its manual should operate it.
- Never leave the appliance unattended while in operation.
- Install a carbon monoxide (CO) detector in the room where the appliance is used to prevent CO poisoning.
- Regular maintenance is crucial to ensure safe operation.
- Ensure the appliance has a proper venting system and is not operated with damaged components.
- CO is a colorless, odorless, and tasteless gas that can cause serious health issues or death.
- Symptoms of CO poisoning include headache, dizziness, and nausea.
- If CO is suspected, evacuate the area and contact emergency services.
- Before lighting, check for leaks and ensure the burner is clean.
- Never light a flooded or hot burner.
- Use only your hand to operate the metering valve control knob.
- Follow a specific sequence for lighting and operating the appliance to ensure safe combustion.
1. Prime the burner by setting the metering valve to its highest setting and allowing fuel to pool.
2. Burn the primer fuel carefully, monitoring it to ensure it does not extinguish prematurely.
3. Once the primer fuel is nearly exhausted, adjust the valve to allow fuel into the burner.
4. Balance combustion by adjusting fuel and air settings to maintain clean, blue-yellow flames.
5. Allow the appliance to accumulate heat gradually to ensure complete combustion.
6. Increase fuel settings gradually as the appliance stabilizes.
7. Once temperature equalizes, the appliance can operate at any fuel setting.
8. To shut down, cut off the fuel supply and allow the fan to run to reduce carbon deposits.
- Proper air flow is essential for safe and clean operation.
- Adjustments to fuel and air settings are necessary to maintain a balanced combustion process.
- Incorrect burning conditions, such as too much or too little air or fuel, can lead to inefficient and unsafe operation.
Understanding and adhering to the guidelines in this manual is critical for the safe and efficient operation of a natural draft diesel appliance. Regular maintenance and monitoring are essential to prevent hazards such as CO poisoning and fire risks.
- Portions of the burner parts may glow red hot.
- Ensure no soot dusting on the viewing window.
- Clean metering valves before first use and at the start of each season.
- Allow 5-10 minutes for fuel lines to fill when the oil-metering valve is first turned on.
- Ensure good metal contact for efficient heat transfer.
- Avoid using gasoline or incendiary fuels for ignition.
- Keep the burner lid or door closed to maintain combustion balance.
- Allow 20 minutes for combustion stabilization after adjustments.
- Flames should burn above the top burner ring and not be sooty.
- Adjust fan speed to maintain proper combustion balance.
- Monitor flame color and adjust fuel and air accordingly.
- Adjust air supply based on fuel settings to maintain combustion balance.
- Test draft using a paper wick to ensure proper air intake.
- Regularly clean fuel tanks, filters, pumps, and lines to prevent contamination and ensure consistent fuel flow.
- Clean the burner to remove carbon deposits and maintain vaporization efficiency.
- Ensure fresh air supply to support combustion and prevent smoke backdraft.
- Regularly clean chimney and cap to maintain draft efficiency.
- Replace fuel filter elements every 1-2 years or as needed.
- Ensure proper assembly to prevent air leaks.
- Clean chimney and cap to remove soot and carbon deposits.
- Avoid damaging the smooth finish of chimney caps during cleaning.
- Clean fuel lines to prevent blockages and ensure consistent fuel delivery.
- Clean burner pot to remove carbon deposits and ensure proper vaporization.
- Use appropriate tools to avoid damaging the burner.
- Clean metering valve at the start of each season or if fuel flow issues arise.
- Ensure needle and seat are clean for proper valve function.
To maintain consistent oil levels, clean the metering valve without using solvents that could damage rubber seals. Do not alter the seat height during cleaning. Reassemble the valve with the float, float pin, and needle. Calibration requires a 2mm allen key to adjust the fuel flow by turning the calibrating screw. Ensure the flow rate matches the specifications for your appliance type.
The valve knob includes a safety fuse that stops fuel supply if overheated. To reset, melt the solder by placing the fuse upside down in a pan until the nut drops back into place. Allow it to cool before handling.
Regular cleaning ensures the pump's longevity. The pump uses a magnetic plunger and check valves to control fuel flow. If inconsistent, lubricate the check valves. Disassemble by removing torx screws, check the plunger and valves, and reassemble with lubrication.
Common issues include soot production, insufficient heat, inconsistent fuel flow, and valve leaks. Solutions involve adjusting air and fuel settings, cleaning components, and ensuring proper installation. For technical support, contact Dickinson Marine with appliance details and issue descriptions.
Includes terms like ABYC, BTU, and various Dickinson stove models, providing definitions related to appliance components and operation.
Catalog excerpts
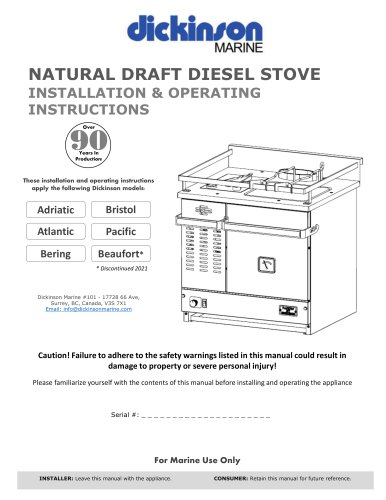
NATURAL DRAFT DIESEL HEATER INSTALATION & OPERATING INSTRUCTIONS These installation and operating instructions apply the following Dickinson models: Dickinson Marine #101 - 17728 66 Ave, Surrey, BC, Canada, V3S 7X1 Email: [email protected] Caution! Failure to adhere to the safety warnings listed in this manual could result indamage to property or severe personal injury! Please familiarize yourself with the contents of this manual before installing and operating the appliance CONSUMER: Retain this manual for future reference. INSTALLER: Leave this manual with the appliance.
Open the catalog to page 1
All rights reserved. No part of this manual may be reproduced without permission in writing from Dickinson Marine. Dickinson also reserves the right to modify or change without notice, any materials, applications, equipment, accessories, and/or prices. All dimensions, measurements and weights are approximate. [email protected] @dickinsonmarine @dickinsonmarine1932 /dickinsonmarine We’d love to see your Dickinson Marine pictures & videos, please follow, tag us and share! Service notes: Appliance model: Fuel Type:
Open the catalog to page 2
………………………………………………………….…...Service notes 1. INTRODUCTION .…………………………………………General Appliance Warnings …………………………………………………………………………Warranty ………………………………………………..Conditions & Limitations 2. ABOUT THIS APPLIANCE .…………………………………….…………..…About This Appliance …………Produced In British Columbia For Over 90 Years ……………….………………FAQ - Frequently Asked Questions ……..……………………………………………..Dimensions & Models …………………………………………………………..Safety Clearances ………………………………………………..Ratings & Specifications …………………………………………………………………..Natural Draft ……….………………………………..Internal Burner Components ……..……………………………………………The Oil Metering...
Open the catalog to page 3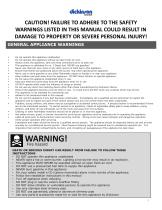
GENERAL APPLIANCE WARNINGS ■ Do not operate this appliance unattended. ■ Do not operate this appliance without an open fresh air vent. ■ Always check the appliance, tank and hose connections prior to each use ■ This appliance is calibrated for no. 2 Diesel fuel. NEVER use gasoline! ■ Never use charcoal, lava rocks or any other source of solid fuel in this appliance. ■ Ensure that flames are positioned above the burner ring when operating the appliance. ■ Never use or store gasoline or any other flammable vapors or liquids in or near your appliance ■ Keep children and pets away from the appliance....
Open the catalog to page 4
WARRANTY We at Dickinson wish to maintain a reasonable and easy system for returns, warranty, returns and exchanges. To accomplish this, we would like to inform you of some helpful guidelines and procedures to use and follow when sending back product to the Dickinson Marine. All correspondence regarding returns, warranties and exchanges will go through the factory of Dickinson Marine in Surrey, BC, Canada and the product must be returned to this location. DICKINSON WARRANTY POLICY Dickinson Marine appliances are covered under limited warranty for a period of one year dated from the purchase of...
Open the catalog to page 5
WARRANTY CONDITIONS & LIMITATIONS WARRANTY PROVISIONS: Dickinson warrants this product to be free of defects in workmanship and materials for a period of one year. This warranty is limited to claims submitted in writing within a one-year period following the date of purchase. If any part of your new product fails because of a manufacturing defect within the warranty period Dickinson offers to replace said parts free of charge, provided, however, that such parts have not been improperly repaired, altered or tampered with or subjected to misuse, abuse or exposed to corrosive conditions. This warranty,...
Open the catalog to page 6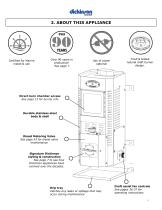
2. ABOUT THIS APPLIANCE OVER Certified for Marine install & use Over 90 years in production! See page 7 Tried & tested natural draft burner design. Direct burn chamber access See page 13 for burner info Durable stainless steel body & shell Diesel Metering Valve See page 43 for diesel valve maintenance Signature Dickinson styling & construction See page 7 to see how Dickinson appliances have evolved over the decades. Drip tray Catches any leaks or spillage that may occur during maintenance Draft assist fan controls See pages 36-37 for operating instructions
Open the catalog to page 7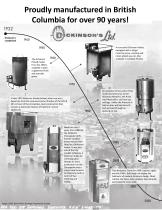
1940 1950 The Dickinson POLAR model from the 1960's, available in both coppertone finish and avocado green. 1960 A very early Dickinson Alaska, equipped with a Singer metering valve, cooktop and nickel plated sea-rail. Also available in multiple finishes. 1970 A later 1975 Dickinson Alaska (below) where we see a departure from the coloured enamel finishes of the 50's & 60's in favor of the all stainless steel construction that remains a distinctive feature of Dickinson marine appliances. An evolution of the earlier Polar model and precursor to the Dickinson Antarctic, the Arctic was fitted with...
Open the catalog to page 8All Dickinson Marine catalogs and brochures
 Mediterranean / Caribbean
26 Pages
 Explorer Propane Fireplace
54 Pages
 Propane Heater P9P12
31 Pages
 Diesel Stove
53 Pages
Archived catalogs
 LOFOTEN-00-LOF - Pdf
41 Pages
 Lofoten Diesel Heater
1 Page
 NEWPORT P9000-P12000
1 Page
 ANTARCTIC DIESEL HEATER
1 Page
 Alaska-00-ALA Pdf
41 Pages
 Pacific-00-PAC . PDF
39 Pages
 BRISTOL-00-BRI.PDF
38 Pages
 BERING-00-BER . PDF
38 Pages
 BEAUFORT-00-BEA.PDF
39 Pages
 Small SEA-B-QUE
1 Page
 Large SEA-B-QUE
1 Page
 Round SEA-B-QUE
1 Page
 Spitfire 180
1 Page
 Propane 2 Burner Cooker
1 Page
 Alaska Diesel Heater
1 Page
 Antarctic Diesel Heater
1 Page
 Newport Diesel Heater
1 Page
 Diesel Cook-Stoves
2 Pages
 Dickinson Cabin Heaters
2 Pages
 Dickinson Marine BBQ
1 Page


