AL35H
AL35H
The AL35H NanoBlaster Bronze is an underwater hull light designed for marine applications. It uses a 35-watt metal halogen bulb, providing 550 lumens with an approximate lifespan of 900+ hours. The light is housed in naval bronze with a borosilicate glass lens, suitable for installation on fiberglass hulls.
Specifications:
- Power Supply: 12 volts
- Cabling: 10ft
- Installation Depth: 12” to 48” below water line
- Water Ingress Protection: IP66
- Fixture Weight: 12.5 lbs
- Maximum Hull Thickness: 5”
Installation Instructions:
- Drill a hole using a hole saw appropriate for the light series.
- Ensure the hull is free of core material and apply epoxy if necessary.
- Use 3M 5200 Marine Adhesive Sealant for securing the light.
- Insert the light with a twisting motion and tighten the locking nut.
- Run cabling to the power source, ensuring correct polarity.
Operation and Maintenance:
- Do not operate the light out of water to prevent overheating.
- Replace the bulb by isolating power, allowing cooling, and following the specified procedure.
- Regularly check for marine growth and clean the lens as needed.
Safety Information:
- Ensure the light is installed by trained professionals.
- Operate only when fully submerged to avoid overheating.
- Regularly check electrical bonding to prevent corrosion.
Warranty:
Aqua Lights offers a 1-year warranty on parts and workmanship, with a lifetime warranty on the bronze fixture. Bulbs are not covered under warranty.
Contact Information:
Aqua Lights, 785 Branch Dr, Alpharetta, GA 30004. Phone: 1-866-924-2782. Website: www.AquaLights.org
Catalog excerpts

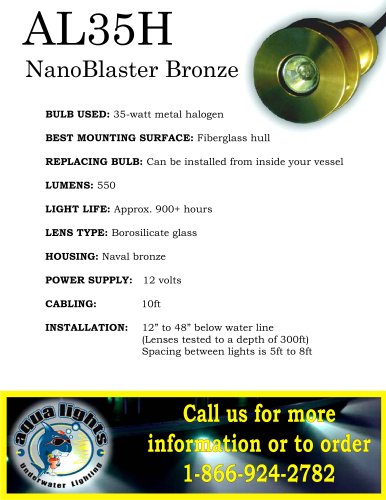
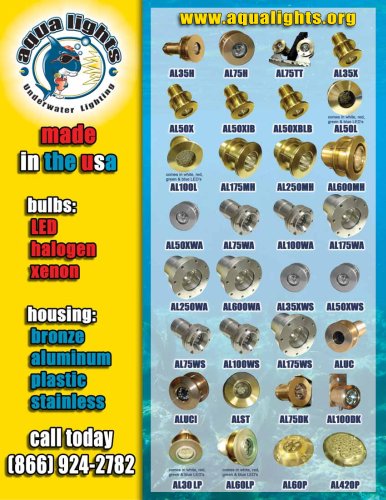
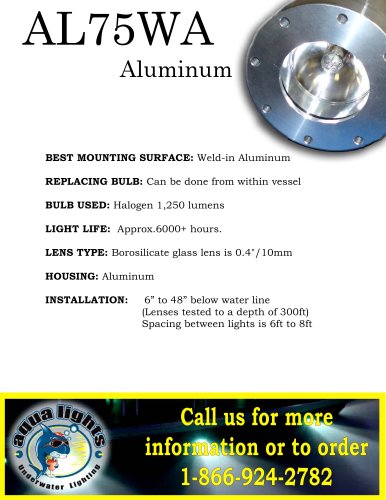
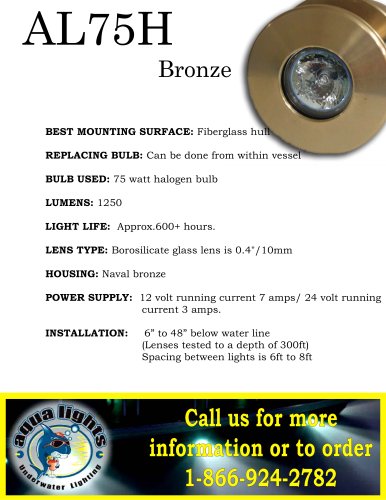
NanoBlaster Bronze BULB USED: 35-watt metal halogen BEST MOUNTING SURFACE: Fiberglass hull REPLACING BULB: Can be installed from inside your vessel LIGHT LIFE: Approx. 900+ hours LENS TYPE: Borosilicate glass HOUSING: Naval bronze POWER SUPPLY: 12 volts INSTALLATION: 12" to 48" below water line (Lenses tested to a depth of 300ft) Spacing between lights is 5ft to 8ft
Open the catalog to page 1
Underwater Hull Light
Open the catalog to page 2
This underwater light has been carefully designed to provide a versatile product of the highest quality, suitable for a wide range of underwater applications such as marine, industrial and domestic. WARNING! Sections in this manual identify safe practice. It is of the utmost importance that this manual is carefully read and understood. Failure to do so may result in electric shock, injury, fire, or equipment damage. PLEASE READ CAREFULLY and, if in doubt, seek professional advice. Light source: 35 watt Halogen Bulb with reflector 4600 K. Lamp replacement: The unit features rear access allowing...
Open the catalog to page 3
Water Ingress Protection Rating: IP66 Specifications ELECTRICAL Input voltage: 12 V AC or 12 Volt DC Mains current draw: 9.25 amps Cable entries: Glanded WARNING: Never operate the light out of water as the water provides necessary cooling. The lens bezel must be completely submerged at all times. Avoid operating the light when the boat is planning as often times this raises the fixture bezel above the water-line and thus diminishing the cooling effect of the water. Generally, Halogen lamps have a service life of approximately 2,000 hours. This may vary depending on the number of restarts and...
Open the catalog to page 4
Socket. IMPORTANT! Ensure the new lamp is wiped totally clean of any dirt or fingerprints. Failure to do so will result in premature lamp burn-out. Inspect the housing to ensure it is completely clean and dry. The lens may be cleaned if neces- sary using a soft cloth on the end of a wooden dowel or similar. Re inspect after cleaning to en- sure no cloth or other cleaning fibers remain inside the housing. NEVER! Spray lubricants, degreasing agents or other similar products into the housing. Carefully re-fit the lamp assembly into the housing ensuring the front end of the reflector case locates...
Open the catalog to page 5
If the housing shows signs of excessive corrosion (other than surface contamination) or physical damage, the vessel should be hauled so a complete assessment can be performed. Any signs of water ingress must be addressed immediately. Any suspect equipment must be repaired or replace. The Lens and Bezel have been carefully designed with a smooth, flush surface to allow easy Never operate the vessel with the lamp housing end cap removed. Limited Warranty Aqua Lights warrants these fixtures to be free of defects in parts and workmanship for 1-year from The date of shipment. Bronze fixture has a...
Open the catalog to page 6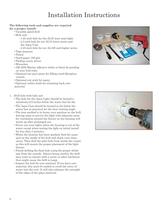
Installation Instructions The following tools and supplies are required Variable speed drill 1.25-inch hole for the AL35 watt mini-light 2.5-inch hole for our AL75 lower series and 4.25-inch hole for our AL100 and higher series Tape measure Sand paper 180 grit Phillips screw driver 3M 5200 Marine adhesive white or black de pending on your hull color. Optional two part epoxy for filling cored fiberglass Optional stir stick for epoxy. Optional utility knife for trimming back core 1. Drill hole with hole saw The hole for the Aqua Light should be located a minimum of 6 inches below the water line...
Open the catalog to page 7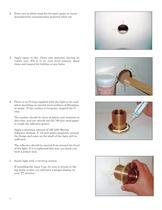
2. Trim core to allow room for two-part epoxy or vessel manufacturer recommended material allow set. 3. Apply epoxy to dry. Clean core material, leaving no visible core. Fill it to an even level amount. Sand clean and inspect for bubbles or pin holes. 4. There is an O-ring supplied with the light to be used when installing on smooth level surfaces of fiberglass or metal . If the surface is irregular, disgard the Oring. The surface should be clean of debris and moisture at this time, and you should use the 180-grit sand paper to rough the adhesion points. Apply a generous amount of 3M 5200 Marine...
Open the catalog to page 8
Tighten the locking nut. On some vessels, if the hull is thin like a solid glass boat or aluminum vessel, make a spacer out of teak, Delron, Starboard to fill the gap. Tighten the leveling bolts so that the fixture is locked into position. Torque bolts to 30 ft lbs. Tighten SS locking bolts lock nuts.
Open the catalog to page 9
9. Attach bulb to base. 10. Insert bulb, retaining spring into fixture. 11. Add bulb backing. 9
Open the catalog to page 10
Tighten water tight cable gland with 7/8" wrench hand tight. Run cabling to power source for halogen lights they will require seven amps for each light AL50 and AL75. Then attach red wire to positive and black to
Open the catalog to page 11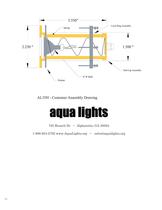
AL35H - Customer Assembly Drawing
Open the catalog to page 12Archived catalogs


- Yachtwerft Meyer LED underwater light
- Yachtwerft Meyer underwater boat light
- Yachtwerft Meyer surface-mount underwater light
- Underwater video camera
- Bronze underwater light
- Through-hull underwater light
- Aluminum hull underwater light
- Boat video camera
- Steel hull underwater light
- Yachtwerft Meyer infrared video camera
- Yachtwerft Meyer low-light video camera
- Through-hull video camera